Amazing Features
Optimizes objects sequence / stacking order in CorelDRAW
Drawing of text and shapes converted to cut-ready curves
Improves your cutting speed
Improves accuracy on vinyl cutters / plotters
Compatible with Windows XP, Vista, 7, 8, and 10
Compatible with CorelDRAW X3, X4, X5, and X6
What's New in Latest Version
Support for inside-before-outside sequencing for shapes that have islands inside their main outlines
Allows multiple users with different user accounts on the same computer
A new licensing system and installer that bundles all the files needed for all supported versions of CorelDRAW into a single installer
The new licensing system requires the use of ID and License files, cut-and-paste is no longer supported
A dongle option to allow use on multiple computers (one at a time) is available for an extra charge
Fixed a bug in the licensing system that prevented using maximum length computer names
Added support for CorelDRAW Home and Student Suite X6
Added support for CorelDRAW Technical Suite X6
Video Tutorials
Artwork Optimizer Demo 1 - Introduction
Artwork Optimizer Demo 2 -
Optimizing Inside Before Outside Sequencing
Artwork Optimizer Pricing
(in US Dollars $)
Purchase Artwork Optimizer Licenses
| Buy 32-Bit Licenses | Buy 64-Bit Licenses | ||
|---|---|---|---|
| First License |
$59.95 | $89.95 | |
| Additional Licenses |
$29.98 (50% OFF) | $44.98 (50% OFF) | |
| Dongle Option |
Can be used on any compatible computer (one at a time). Great for working in multiple locations and sharing within a team. Learn More | ||
| Shop Online to Purchase Artwork Optimizer Licenses |
Please choose CorelDRAW Version
|
||
Important Notes:
-
To purchase an extra license you must already own a first (primary) license.
-
Dragon Creations will be listed as the seller on your bank statement.
-
Artwork Optimizer is compatible with Windows XP, Vista, 7, 8, and 10.
Artwork Optimizer is compatible with CorelDRAW X3, X4, X5, and X6. -
Artwork Optimizer for CorelDRAW X6 runs not only on CorelDRAW 32-bit, but also on 64-bit.
-
To install the 32 bit CorelDRAW on 64 bit Windows, put the DVD in the drive, right click on the DVD icon and select explore. Navigate to the X86 folder and run the setup from there.
-
If you can't unzip the distribution file(s) then you can download WinZIP from Corel: www.winzip.com or from a free WinZIP alternative from www.jzip.com.
-
There is documentation and an installation file in each zip file. You can download Adobe Reader at www.get.adobe.com/reader if necessary.
How It Works
Installation of the Artwork Optimizer Standard Edition is very simple. Just select the installer you want (X3, X4, X5 or X6) and run the "Setup.exe" program that is in that ZIP file. We don't automatically detect which version you want since many people (myself included) have multiple versions. I have X3, X4, X5, and X6 all installed together on my development laptop. In fact, you can install for any or all versions and the same license will work. If you cannot download the installation ZIP file because it has an EXE file in it then contact us at support@CorelDRAWTools.com (or use the Contact Form please) and we will send you a special ZIP file and extra instructions.
Disk Drive Used
If your computer does NOT have a C: drive then just install as usual. Substitute the drive letter you installed on for the C: in the examples in this document. For example, a system that only has an I: main disk drive will usually have CorelDRAW X3 installed here:
I:\Program Files\Corel\CorelDRAW Graphics Suite 13
Windows 10
Windows 10 is only supported for CorelDRAW X6, since Corel only supports X6.
Windows Vista
Windows Vista is only supported for CorelDRAW X3 and X4, since Corel only supports X3 and X4.
If you encounter difficulties installing on Vista, please try disabling the UAC temporarily and reinstalling.Windows 7
Windows 7 is only supported for CorelDRAW X4 and X5, since Corel only supports X4 and X5.
Customizing the Toolbar for CorelDRAW X3, X4, X5, and X6
If you want to change the toolbar that the Artwork Optimizer Standard Edition button appears on just edit the ArtworkOptimizerStd.ini file using NOTEPAD.EXE. Change the ToolBarName=Standard to whatever toolbar you would like to use. For example, if you have created a toolbar just to hold all the buttons from macros and other CorelDRAW addins you have acquired then use that name. The toolbar name MUST be EXACTLY the same as you see in the CorelDRAW customization screen. You can find the ArtworkOptimizerStd.ini file at:
C:\LeonardCncSoftware\Artwork Optimizer Standard Edition
Please only use NOTEPAD (from the windows accessories menu) to do any editing. Other editors like Microsoft Word will make the file unusable as a Artwork Optimizer Standard Edition configuration file.
CorelDRAW V12
The Artwork Optimizer is not available for CorelDRAW V12 due to the use of advanced features that are only present in X3 and later releases of CorelDRAW.
The main screen of the Artwork Optimizer Standard Edition shows the different options that are available. The 'Quick Start' section gives a simple workflow that will get you going ASAP.

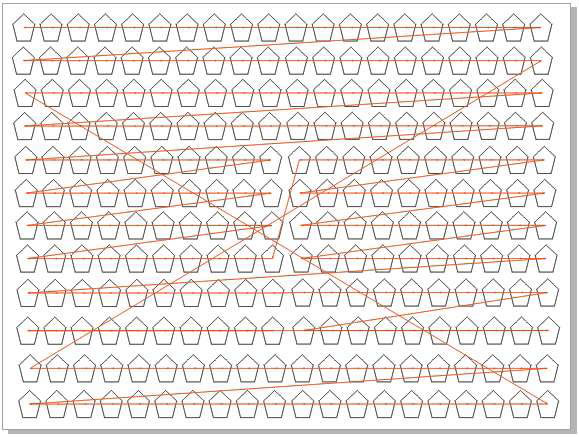
The 'Show Shape Sequence' screen allows you to preview the existing shape sequence / stacking order so you can see what problems may occur when you go to cut the drawing on your CNC router, laser or vinyl cutter. Just press the 'Show Seq' button and the tool will display a screen showing the sequence layout after displaying a screen with a progress bar for a short time.

The following screen will display while the existing drawing sequence is being shown:

Here is the existing sequence for the LaserSeq_01.cdr drawing:
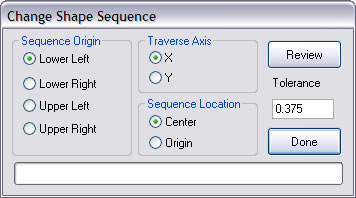
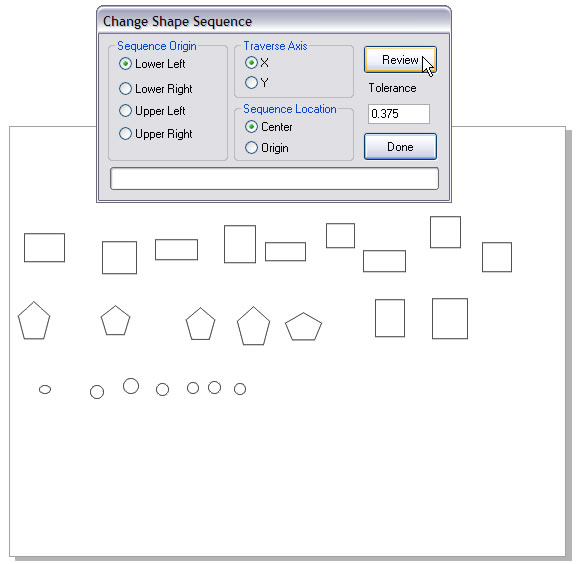
This is the screen that sets the parameters to rearrange the drawing sequence. You can choose any corner to be the starting point and either X Axis Traverse (Row) or Y Axis Traverse (Column) order. The center of the shape or the shape origin can be specified for the shape position to use. The Tolerance value is what determines what is a Row or a Column. All shapes whose positions fall within the tolerance (variance) will be in the row or column.
Press the 'Review' button to perform the shape sequencing operation.
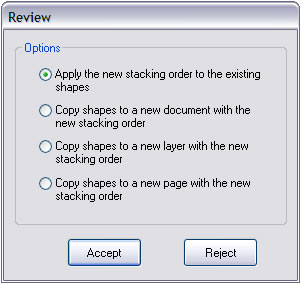
This screen will display after the sequencing operation has finished. It has both 'Accept' and 'Reject' buttons. If you Reject the sequencing operation no changes will be made to the current drawing. If you Accept the sequencing operation then the drawing will be modified according to which radio button was selected. The 'Apply the new stacking order to the existing shapes' is the default since it will probably be the most common choice.
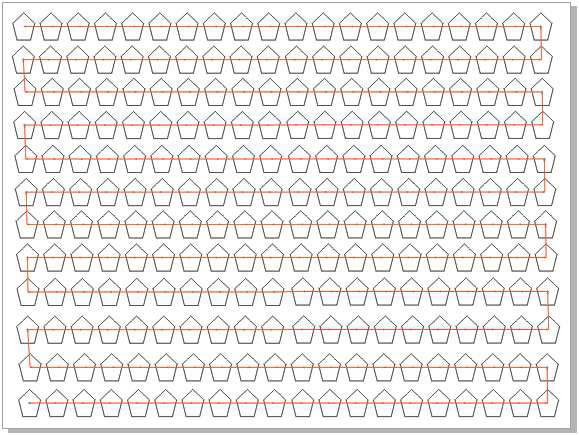
Here is the revised sequence for the LaserSeq_01.cdr drawing:
Note that after you press the Accept button you still need to save the drawing to make the changes permanent.
To get started, just push the toolbar button that was installed for your version of CorelDRAW. This will display the main menu screen for the Artwork Optimizer. Note that if you do not have the drawing that you want to optimize open then you must open it now.
This is the Artwork Optimizer main menu screen that you will see when you have the 'seq_test_01' example open.
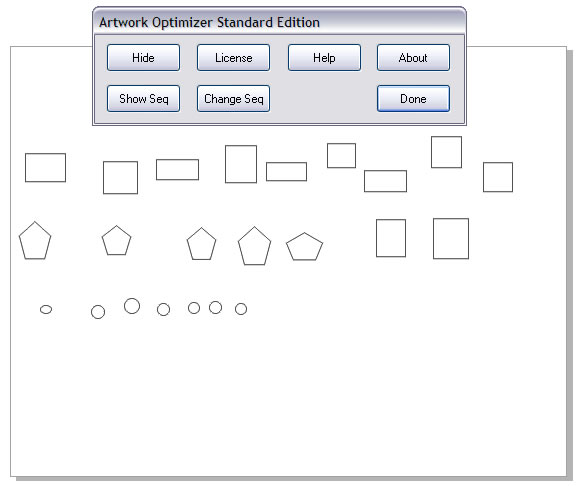
Use the 'Show Seq' button to display the 'Show Shape Sequence' screen with the progress bar.

The existing stacking order will display along with the 'Show Sequence Completed' screen. When you press the 'Done' button this screen will disappear and so will the red sequence arrows and lines.
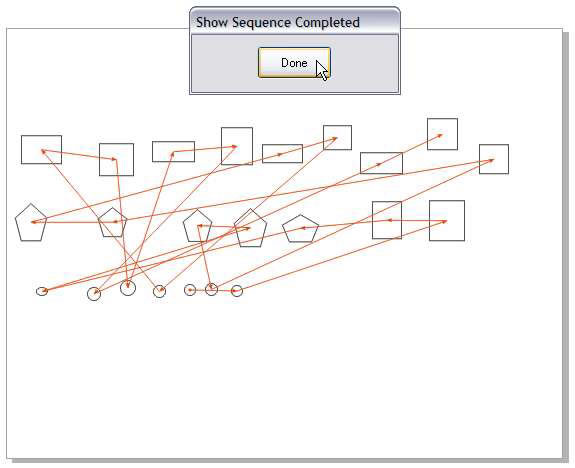
To change the shape sequence press the 'Change Seq' button on the main menu screen:

The 'Change Shape Sequence' screen will appear. Press the 'Review' button to perform the shape sequencing.
After the sequencing is finished the 'Review' screen will display and you can either Accept or Reject the new sequence that is displayed. You can choose one of four options for accepting the new sequence.
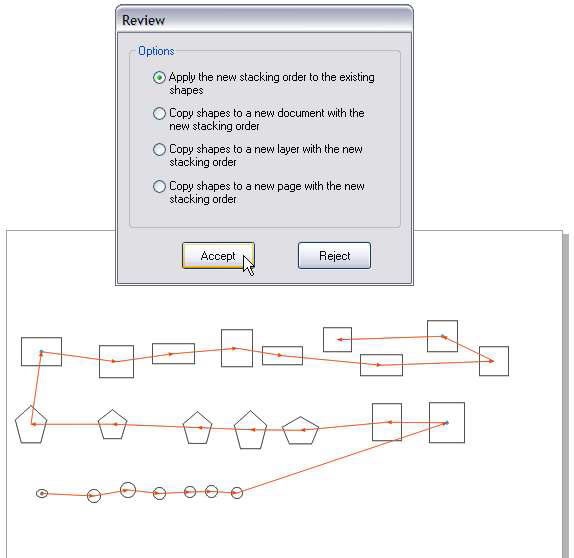
Be sure to save the drawing after accepting or all changes will be lost.
There are two example drawings that are installed with the Artwork Optimizer. They can all be found in the folder
C:\LeonardCncSoftware\Artwork Optimizer Standard Edition\SampleDrawings.
LaserSeq_01.cdr Example
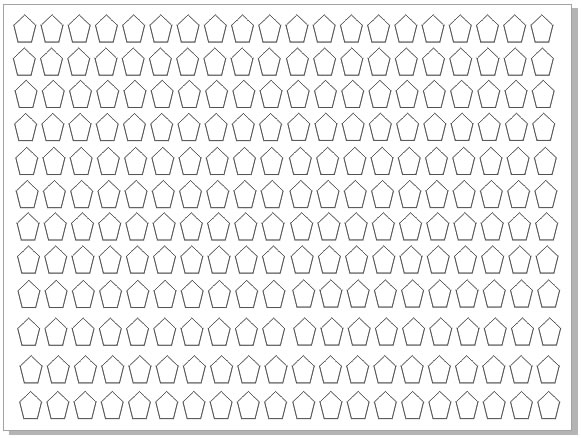
seq_test_01.cdr Example
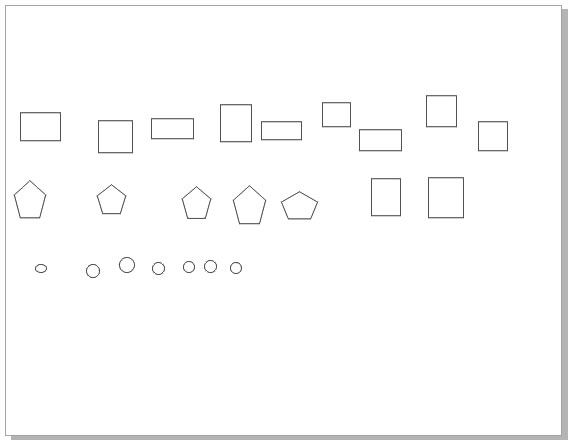
These are the drawings that were used in the documentation. They are saved in X3 format so they can be used with X3, X4, X5 or X6.

